How to make yogurt
|
Once upon a time, I was really intimidated about making yogurt. There were so many directions and I am not good at following directions – I’m a free spirit, okay?. But when I met my friend Jenna years ago, who made yogurt literally every day, I decided to give it a try. She assured me that it really is easy and if I messed up, I could just use it in baking. So I gave it a try and it actually worked! I made yogurt for my family for years. Recently, I’ve begun making my own yogurt again for three reasons:
How to make yogurtBefore you get started, you’ll want to gather your supplies and sterilize the tools you’ll be using to make the yogurt. You don’t want to introduce any other bacteria that might mess up your yogurt, however, I admit that I haven’t done this once since I started making yogurt again and it’s been fine. So do what you want. For the process you’ll need:
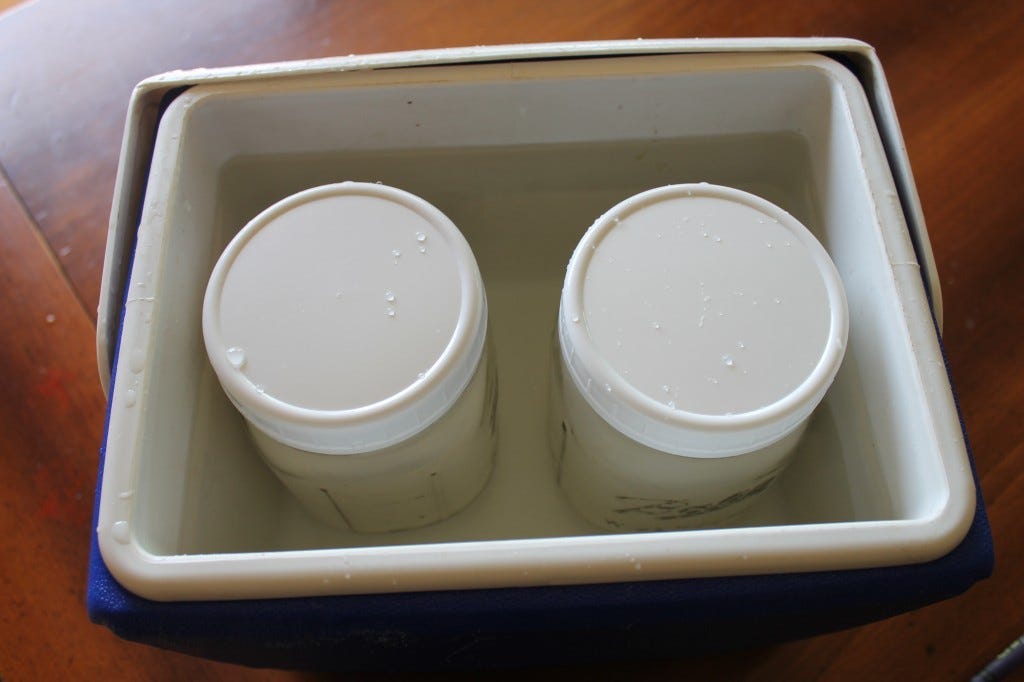
First, you’ll want to sterilize your tools. Fill your pot with water (enough to cover the two jars lying on their sides), then bring it to a boil. Put in the spoon, jars (on their sides) and clip the thermometer to the side of the pot so the probe side is in the water. Let them sit in their for 5 minutes, drain the water and let the sterilized equipment sit on a clean towel to dry off. Now, pour your milk into the pot and put in the stove on medium high heat and heat it up to 180 degrees. That’s just before it starts to boil and it gets the thin skin forming on top. I put my thermometer in periodically to check. Once it gets there, turn off the heat and move your pot to a cool part of the stove or countertop (don’t forget a hot pad if you don’t have stone counters). It’s going to cool to 110-115 degrees (this takes about 15-20 minutes for me because of my cold counter tops and it used to take longer, so don’t feel like you have to sit and stare at the thermometer until it cools down). Once it’s cooled, measure out 1/4 cup of plain yogurt with active cultures into one of your jars. I either use a little from a previously made batch or just a store bought yogurt with live cultures. Add a spoonful or two of the cooled milk to the starter and mix them together. (It’s important to wait until it’s cooled so you don’t kill the bacteria.) Next, pour the milk/starter mixture into the pot and stir it all together. Then pour the milk into the two quart jars and put on your lids. I like to use a canning funnel to do this so I don’t spill it everywhere. Now you need it to incubate. It needs to do this for about 8 hours in a place that is warm, where it won’t get moved. You can do this a couple of ways: Put the jars in a small cooler (I use one like this that I got at a yard sale), fill it with up to the bottoms of the lids with hot tap water, lock the lid in place and let it sit somewhere warm and dark for 8 hours. Apparently I used to wrap it in a bath towel for extra insulation but I forgot about that and haven’t been doing it since I started making yogurt again. My yogurt turns out just fine. Use a yogurt incubator (like this one). I prefer multi-purpose kitchen appliances, but this is worth the investment if you’ll be making yogurt regularly and have enough space to store it. I have also heard that you can use an Instant Pot to do it but I have not tried it in mine.
There are other ways to incubate yogurt that you can read about here. Once it’s incubated and set up, store the yogurt in the fridge and enjoy! How to make Greek yogurtIf you want to make Greek yogurt, you’ll just need some cheesecloth and a fine mesh strainer. Strain your freshly made yogurt through a cheesecloth-lined fine-mesh sieve into a bowl for two hours (or up to overnight, depending on how thick you like it). You can use the whey (liquid) you drain for smoothies or to use in baking. *Right after I posted this my friend Leah read it and let me know that making it in the Instant Pot is hella easy. And she showed me this reusable yogurt strainer that is super easy to clean. Thanks, friend! **On my latest batch of yogurt, I got completely distracted with a DMV form when it was almost to temperature and then my milk boiled over. I decided to make it anyway and the result was a much thicker yogurt. I looked it up and apparently, I denatured the proteins, which makes yogurt thicker with a more mild taste. The right way to do that, apparently, is to hold is at 190 degrees for 10 minutes. Or just get really distracted and let it boil over. Do you make your own yogurt? |
The Flourishing Body
You would think that as a nutrition coach, I would love meal planning. But nope. I hate it. Yet when I don’t do it I find myself in the vicious “I don’t know what to make for dinner, let’s just eat out” cycle that ends up costing a lot of money. Or I end up scavenging through the pantry and eating like a raccoon. Neither option is ideal. My biggest menu-planning challenge? Being overwhelmed by all of the variety I felt I needed to have on the menu. Why was it so much easier to simplify other...
I was sitting at the table the other day, thinking about food. As one does. But in this case, I wasn’t thinking about eating or actually eating, I was thinking about the gift of food. The gift of cooking, of thoughtful preparation and presentation. Because, really, it is a gift. We could be scavengers, picking up whatever we find on the side of the road and bringing it home (or eating on site). Or, we could just eat like my dogs, a jumble of raw meats, fruits and vegetables tossed in a bowl....
This was one of my most popular posts on food back when I was a natural living blogger. I’ve updated to reflect my current strategies, which, incidentally, really haven’t changed much in 20 years. Today I’m answering one of the most common questions I get: how do I save money on healthy food? I’ve been using this strategy for years, leaning heavily on principles I gleaned from The Complete Tightwad Gazette (best Mother’s Day gift ever…). Even though many of the recipes/tips in that book are...